Routing in Incident allows you to automate your work flow process for new requests. It tells the system when and where to send incidents. Incidents can be automatically routed based on the Problem Type, Location, Building, Purpose, Project, or any combination of the five. Two of the most commonly used routing patterns are location based and problem type based.
Location based routing automatically routes an incident based on its assigned location. Most commonly, it may go to a site resource user assigned to that location who is responsible for resolving simple requests before sending more complex issues on to the IT department.
Problem Type based routing automatically routes an incident based on the selected problem type. Most commonly, the incident will be automatically assigned to the technician or work queue responsible for the defined problem type. (Example: Network problem type incidents would be assigned directly to a specific technician.)
How to Set Up Location Based Routing
- Click on the Account Setup tab.
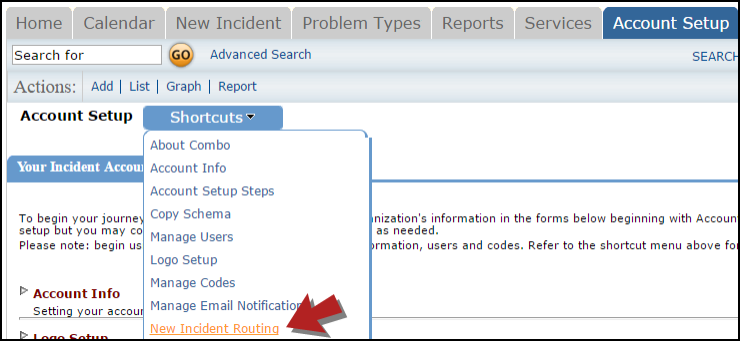
- Click on New Incident Routing, or hover your mouse over the Shortcuts menu and click New Incident Routing.
- Under the Add section, choose the name of the location in the Location drop down box.
- Leave "No One" selected in the When Approved By drop down box.
- Under Route To Person / Work Queue, select a specific user's name in the top box OR the assigned work queue in the bottom box.
- Click the Add New button to save. This route now moves up to the list of routes at the top of the page. *Note: In the example pictured below, this route instructs the system: Any time a new incident is submitted for Dude Central, send the incident directly to Sam Clark who is the site resource for that location.

How to Set Up Problem Type Based Routing
- Click on the Account Setup tab.
- Click on New Incident Routing.
- Under the Add section, choose the problem type from the Problem Type drop down box.
- Leave "No One" selected in the When Approved By drop down box.
- Under Route To Person / Work Queue, select a specific user's name in the top box OR the assigned work queue in the bottom box that is responsible for that problem type.
- Click the Add New button to save. *Note: In the example pictured below, this route instructs the system: Any time an incident is submitted for the problem type of Accounts, assign the incident directly to the Account Management work queue.

How to Edit or Delete Routes
- To edit a route, click the Edit button next to the route you would like to change.
- The route will move to the Edit section below the route list. Use the drop downs to make your changes.
- Click Save to update the route.
- To delete a route, click the red x (
 ) to the right of the route.

